Posts tagged modern decor
DIY Minimalist Floating Wood Shelf

For a while now, I’ve been shopping for a minimal raw wood floating shelf, but to no success. Knowing that adding shelving to your walls will enhance your space, I always make it an effort to do so. I have always loved floating wood shelves in particular. So, I decided to take it into my own hands and design one that was not only pretty and the exact aesthetic I was going for, but inexpensive and easy to make.

This post is meant to provide the exact measurements and supplies that you will need. I also filmed a video of me making this exact shelf from start to finish so that you can easily visualize each step and refer back to it if you decide to make one for yourself.

Hello Lovely Living

All supplies besides the drill set (which was purchased at Ikea) where purchased at Home Depot, so this is an easy one-stop project. It is a very affordable project as well at under $15 for all supplies, and you could easily make multiple shelves for under $10 with leftover supplies.

Watch the video below for a quick tutorial on how to make this floating shelf!

SUPPLIES


• 1 - 0.75” depth x 5.5” width x 24” length piece of maple wood board

• 60 sandpaper for wood (comes in pack of 5 sheets)

• 2 - #10x3” phillips wood screws (comes in pack of 2)

• 2 - EZ Ancor drywall anchor that hangs up to 75lbs (comes in pack of 4)

• #12-24 Everbilt machine screw nuts (comes in pack of 10)

• 3/4” diameter x 48” length wooden dowel (cut down to 2 - 7” pieces.

• Drill bit and phillips screwdriver

INSTRUCTIONS


STEP 1

Cut dowels

Home Depot has a saw station that you can use to cut down your wooden dowels. Cut 2 - 7” pieces. With remaining wood, you could easily make 4 more pieces depending on if you are making multiple shelves. Of course, you’d need to adjust your amount of supplies if that is the case.


STEP 2

Sand dowels

Sand down the ends of the wooden dowels until smooth.


STEP 3

Drill dowels

Drill one side of each dowel 2” deep and at a circumference that allows for the head of the phillips screw to be completely inserted. I drilled my holes to a width of 1.25 cm since my screws had a lip that wide.


STEP 4

measure your wall

Measure the width of the wall you are planning to hang your shelf on. Since the piece of wood is 24” in length, you will need to leave an equal amount of space at each end in order to center it on the wall. This amount will depend on your individual space. Once you’ve identified how much space you need for each side, measure 3.25” from each edge of the piece of wood. This is where your wooden dowels will be placed and where you will place your holes in your wall. Use a leveler to make sure that everything is even before drilling your holes. I just downloaded a leveler in the app store and used my phone to do this.


STEP 5

Install drywall anchors and screws

With your drill bit, drill your holes into the wall and then screw the drywall anchors in place with a phillips screwdriver. Take your phillips screws and run a screw nut through each before you install them. Screw in until secured and tight (about 1”). Leave a 2” allowance to insert the wooden dowels into.

STEP 6

Insert wooden dowels and hang

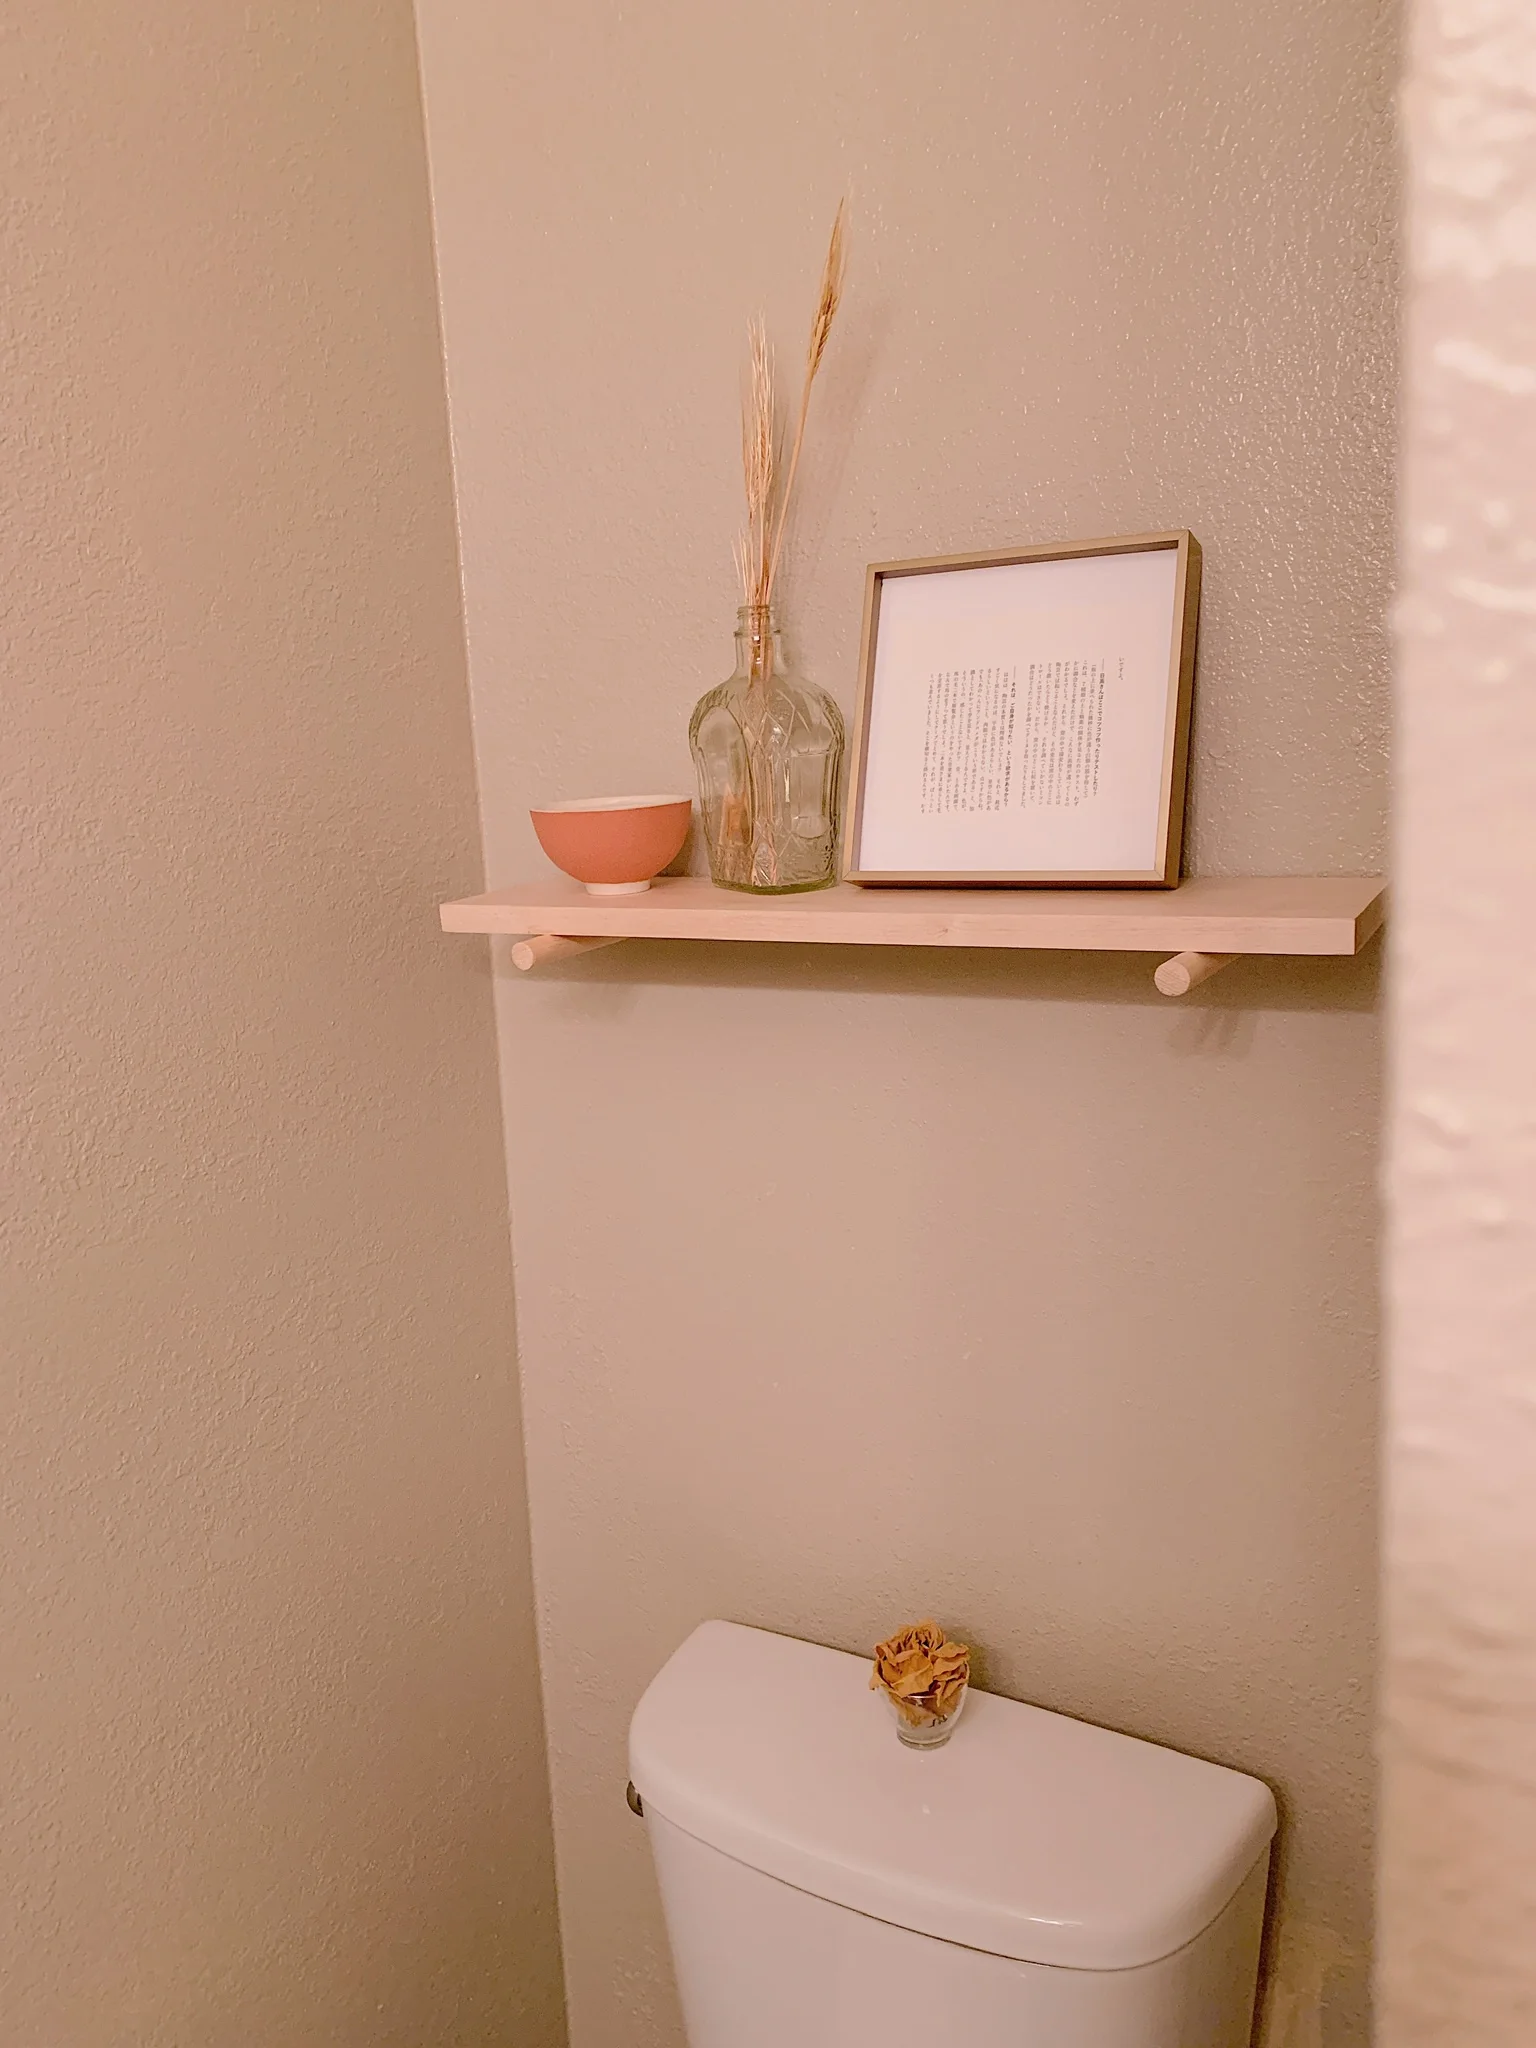
Insert the wooden dowels into the screw and nut until secure. Hang shelf and then style with finishing touches. Make sure to keep shelf flush to wall so that all the weight is held up against the screws.

public.jpeg

Wasn’t that an easy project! If you try this project, make sure to tag me @hellolovelyliving on Instagram so I can see!

I also have another hanging wood shelf project you may be interested in too. You can see that here!

What home decor projects have you been wanting to do lately?


A Little Spring Encouragement + Free Digital Print

Spring has sprung! Seeing the sight of trees in bloom not only gets me excited for warmer months, but it refreshes my perspective and it reminds me that there is beauty in the wait. There are so many subtle reminders in nature that provide the lessons that we need, and I believe that nothing happens by accident. There is a reason for everything. However, like my quote illustrates below, although everything happens for a reason, some things happen for a season.

 
HelloLovelyLiving.com | A Little Spring Encouragement + Free Digital Print
 

Yes, we'd all like to believe that everything lasts, but the reality is that life is transient by nature. Things happen that shake up our very existence only to challenge our ability to stand strong in the midst of it. What happens on that testing ground determines the outcome of our circumstances.  

I was having a talk with my son, Kodi, and he made a statement that was so profound. "Thoughts are fluid." I mean, coming from a 14-year-old, that simply blew me away. What he meant by this statement was that you can't control people's thoughts. They change. People change. I mean! Proud mama moment right there.

If thoughts are fluid, we as human beings are, too. We were not meant to be in a solid, permanent state. We were meant to move and adapt. Just like every living thing adapts to the changing seasons, we must do the same. We must also learn to recognize unhealthy patterns in our life and initiate change. 


Sometimes we grow
in a twisted, sideways manner
rather than straight up

but in the end,
our branches
always seek the light

and the trees
that bear
the sweetest fruit
endure
the longest winters.
— April Green


As the new season approaches, I just want to encourage those of you in particular that may be going through a difficult season. Know that it is not meant to destroy you, but to build you. It will not last forever, it will pass. 

Get excited when there is a time of resistance in life because that is the very time when your strength will come out. You don't know how much you have within you until you are tested. Take this time as an opportunity to bring out the best in yourself and develop areas that you haven't really paid attention to. Shed the old, welcome the new.


HelloLovelyLiving.com | Free Printable


In my personal experience, I've learned how to recognize the different seasons of my life for what they are and not be resistant to whatever lessons that I am supposed to learn in those moments. I actually get really excited when things get hard and difficult because I know that just by going through those experiences, I am growing through them. I welcome every opportunity that requires me to take a deeper look at my life and myself because I don't ever want to be comfortable in my ways or lead a comfortable life where I am never challenged or never challenge myself.

I created the free digital print that you see above for you to frame and keep up as a reminder for those times when it's hard to see things for what they are. Rest in the idea that everything happens for a reason, but know that some things happen for a season. Your seasons do not necessarily define you, you define how your seasons will impact you - either positively or negatively.

Cheers to experiencing the fulness of life through every season!


I hope you enjoyed this little reminder and that it encouraged you through whatever season you are currently facing today. If you need more inspiration on the daily, I post every day on Instagram + keep you motivated and inspired with uplifting content. I'd love to see you over there!

Do you enjoy these types of posts? Let's chat in the comments below!


DIY Modern Plant Stand Projects Because #PlantLady
DIY Modern Plant Stand Projects Because #PlantLady | HelloLovelyLiving.com

via The House That Lars Built

Being a plant lady these days bring me great, great joy. Never in my wildest dreams would I have imagined how happy plants could make me, but they do.

Could I survive alone in a jungle? Probably.

Yes - that's how happy they make me, and maybe some of you can relate to my obsession.

Lately, I've been wanting to get my hands on every known modern plant stand out there at the moment.

Of course, not one of those has made its way into my home (YET), which makes me very sad.

So, in the meantime, I decided to compile a roundup of DIY Plant Stand Projects that makes waiting one more second that more bearable until my hubby lets me start on another DIY project.

Let's just say, I have a lot of projects that he'd like to see completed before I start on a new one!

Hopefully, I can start on another project soon enough once I share my latest project with you all, which I have nearly given up on but keep faith that it will soon come together. The struggle is real! #PrayForStina

I hope you find a project you like below in my latest Mode story and try your hand at it. Most of them are super easy to make. Have fun my fellow plant chicas!

Sharing Is Caring | HelloLovelyLiving.com